Browsing Category

Decorating

1 In Clear Day Farm/ Decorating

Home for the Holidays

Our home is still all decked out for Christmas and since I didn’t get a chance to share before Christmas, I thought I’d share it now.  Better late than never, right?  Truth be told, the garland I was making for the tree isn’t even finished and there are still more decorations I had plans for…  But it is still fun to document and share how things looked this year!

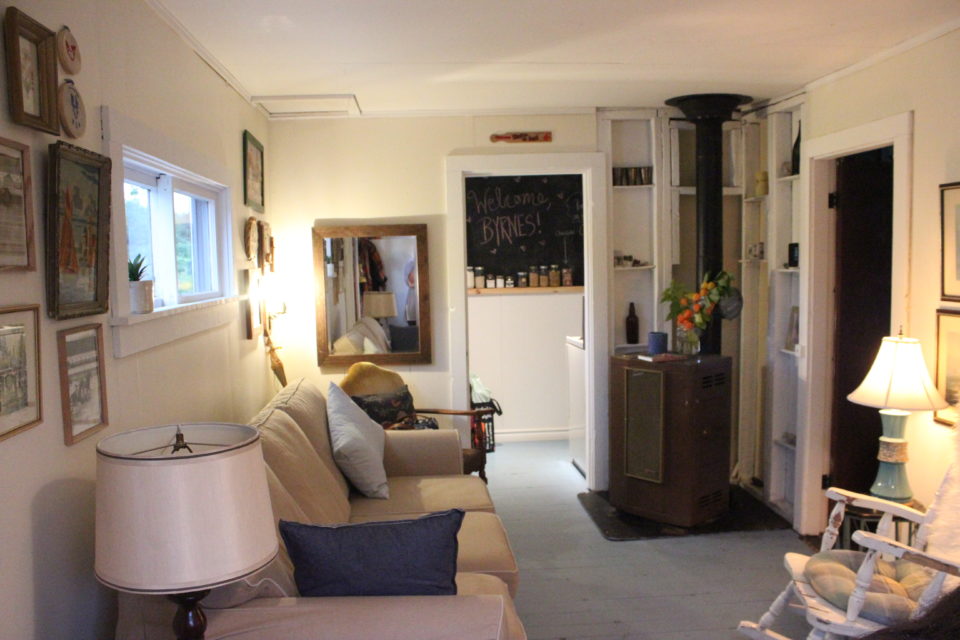
Our tree is plump and full, very different from the tree we found in the back woods last year.  It takes up a large amount of the living room and if you are sitting in the chairs on either side, you have to lean very far forward to be able to talk to the other person.  But when there are only 6 huge trees left on the lot when you finally get around to going for your tree, you take what you can get and we do quite love it.

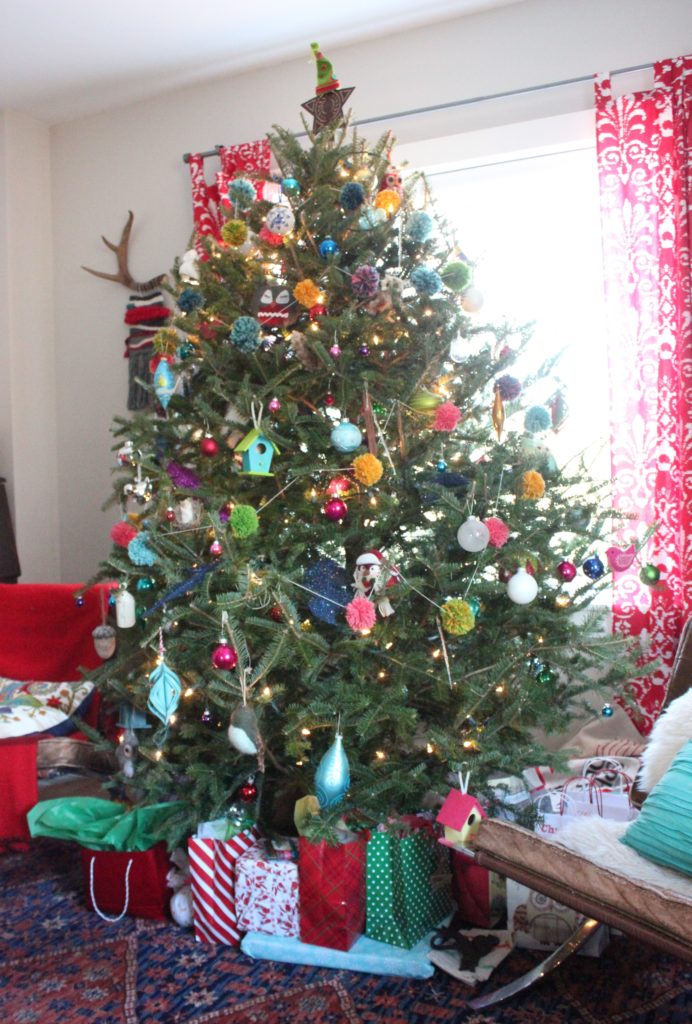
I’ve been toying with doing a bird themed tree for the last few years and finally decided this was the year.  I wanted it bright and colourful, using some of the coloured balls that I’ve had for years.  I also wanted to add a bunch of pompoms, too, so I dug into my yarn stash and started whipping out some while watching Netflix with the handsome Mr. Byrne.  I especially love the finishing touch Lena added to our rustic star to help tie it in….every star needs a bright toque, right?  And note the lack of ornaments along the bottom, Penny has been knocking them off with her enthusiastic tail, so they’ve been relocated higher on the tree – and I wouldn’t trade it for anything!!

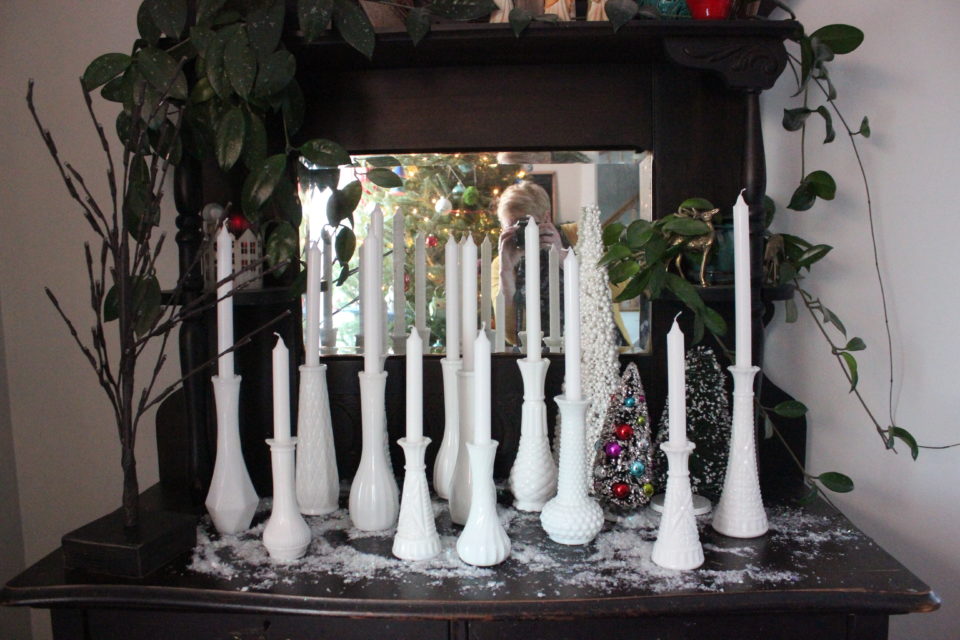
I was scrolling through Instagram a while back and saw a collection of milk glass vases with tapers in them and knew I needed to do that this year.  I gathered up all my vases and grabbed some tapers from the dollar store and made it happen.  And I love how it turned out, I’m sure it’ll be sticking around for the winter season.

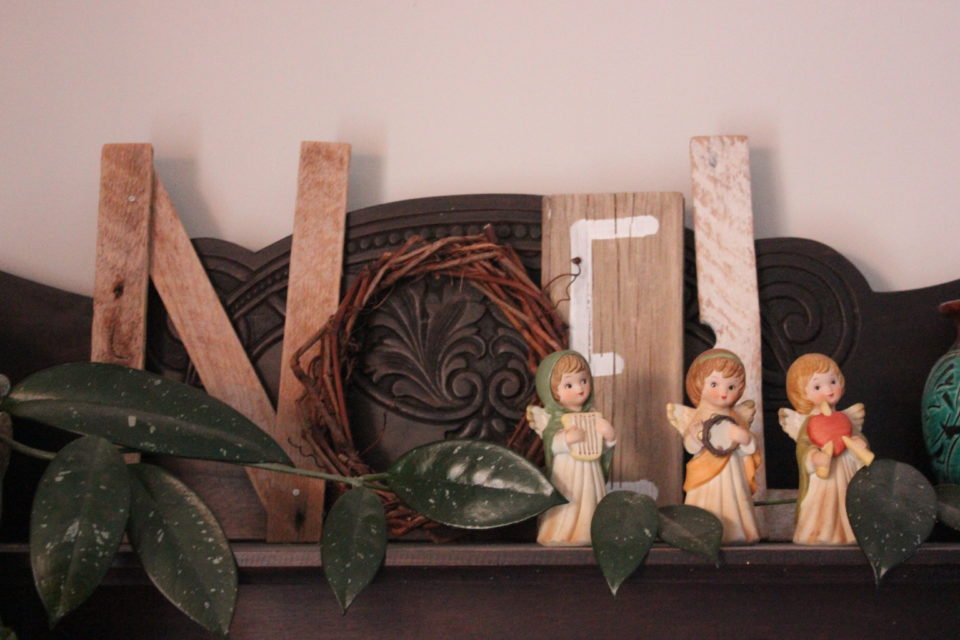
And of course my NOEL and angels had to come out again.  I’ve had those little angels for more years than I can remember and I love how vintage and special they are.

Another addition to the Christmas decor this year is the ‘wreath’ on the basement door.  I had this tray for a long time and had used it as a magnetic board for a while in the studio but when I redid the studio, it came down.  And the sugar dish and creamer were given to me by a friend who found them in the loft of her barn, you can see what they looked like HERE. The idea of hanging them all together was one I came across on Pinterest and really liked it. I used some real looking faux cedar from Michaels so I didn’t have to re-do it each year.  I think it’s perfect for our kitchen, don’t you?

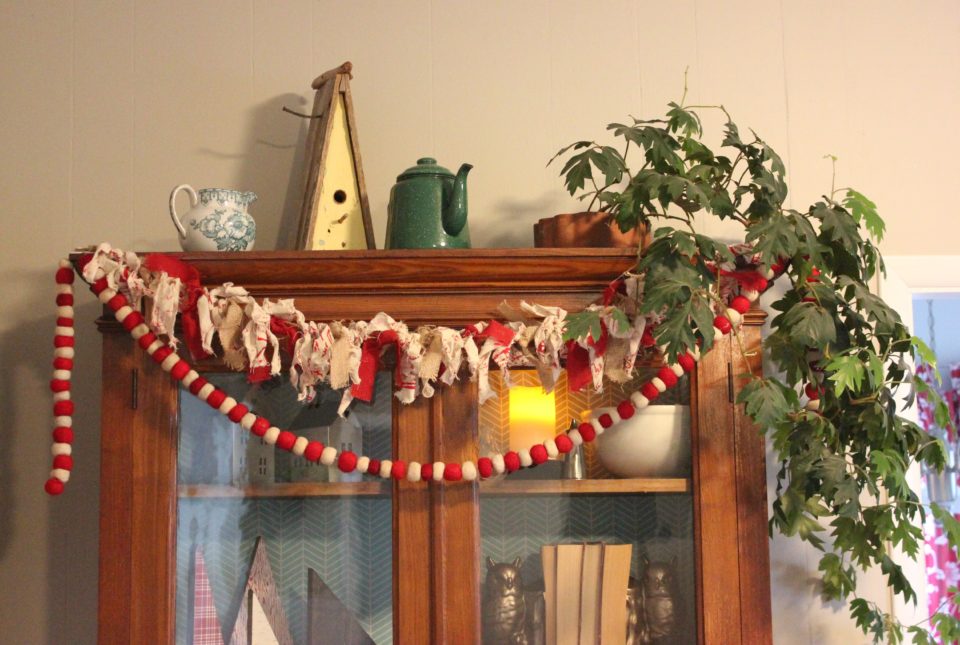
The china cabinet got decorated as well this year, but Lena was the one to do all the shelves over.  I love that she wanted to do it and took the time to create a new look.  It’s neat to see the same things we have had for years being used in a new way.

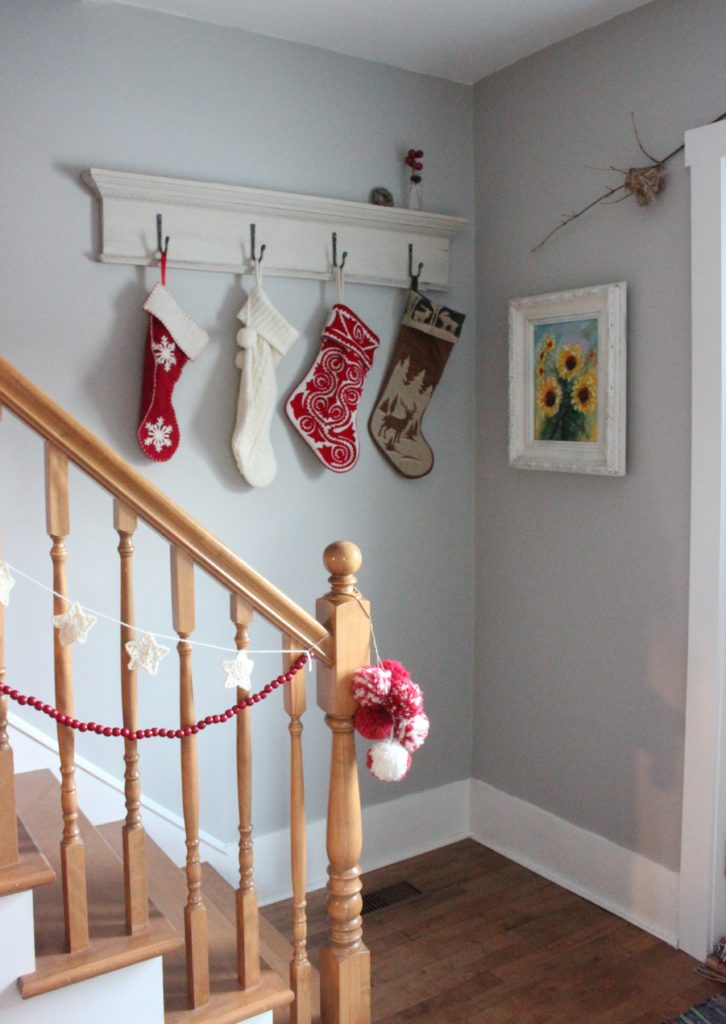
Last year this lintel was in the studio and I finally convinced the handsome Mr.Byrne that we needed it at the bottom of the stairs.  I think it was the right call, don’t you?  I also love the stockings hung off it and not the railing, like previous years.  The crocheted stars and red bead strings are enough for the stairs with a few puffy pompoms to finish it off.

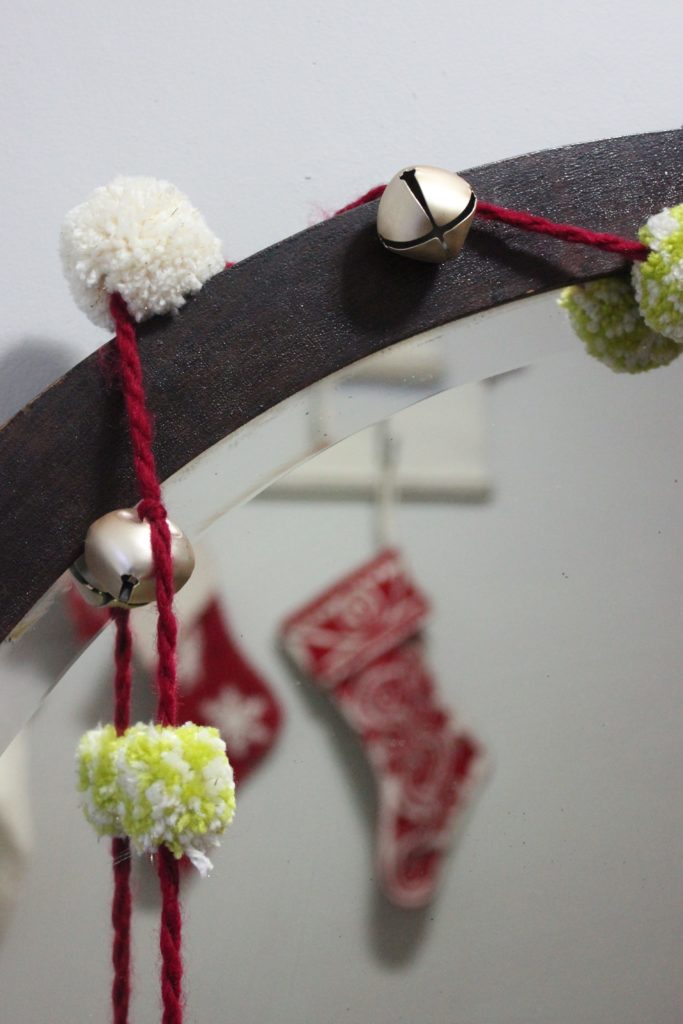
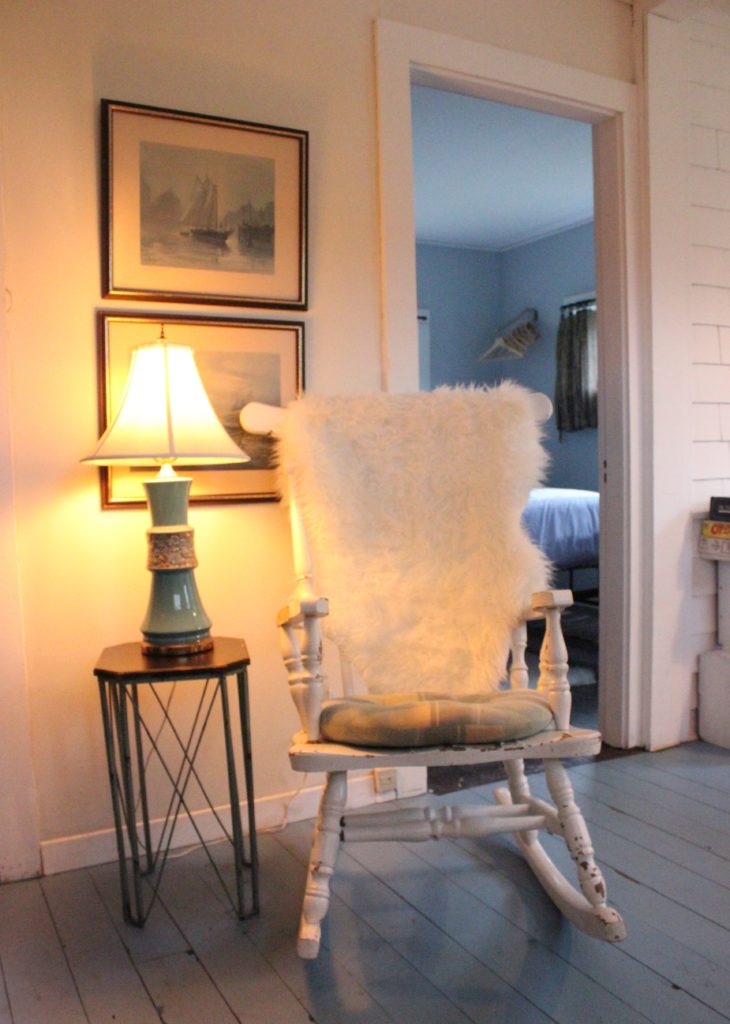
The mirror just across the way got a simple strand of pompoms and bells.  I picked this pretty garland up at a local craft sale a few years back and I do quite enjoy it still.  So simple and yet the perfect way to dress it up without being over the top.

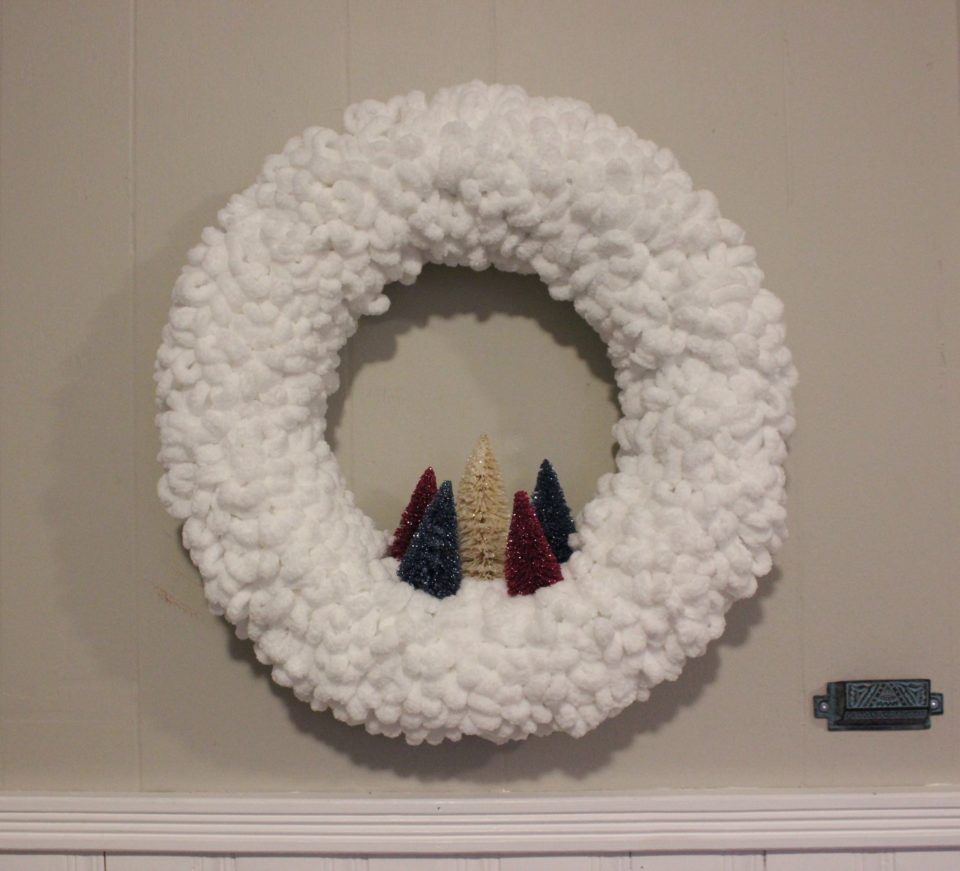
The other DIY project I did tackle this year is this oh-so-easy wreath.  I was scrolling Pinterest and found an unassuming pin that lead me to a simple but impressive wreath idea for our front door. { even though I have it in the kitchen for the picture } I can’t tell you how easy this was.  If you can wrap a circle with yarn, you can do this.  I’m not going to give you a tutorial because there is one HERE, and if you make it, I’d love to see!!

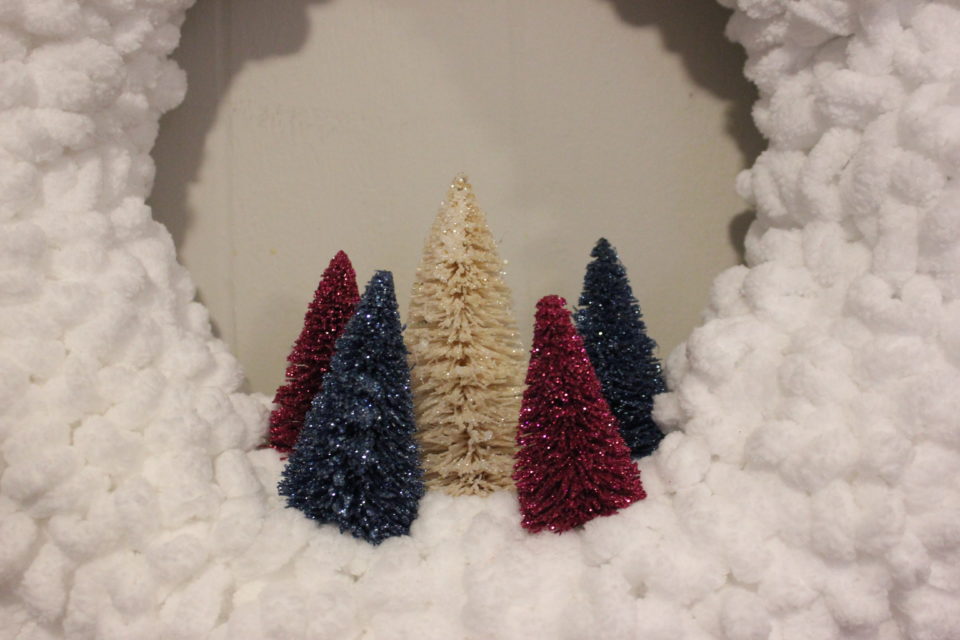
I had these bottle brush trees tucked in another display in the living room but wanted them in this wreath so I pulled them off the cabinet and hot glued them in place.  Now my wreath looks amazing and the other display looks like crap but whatever.  I love seeing how everyone is using their bottle brush trees for their fall and Christmas displays.  Retro is the new cool and I’m on board.

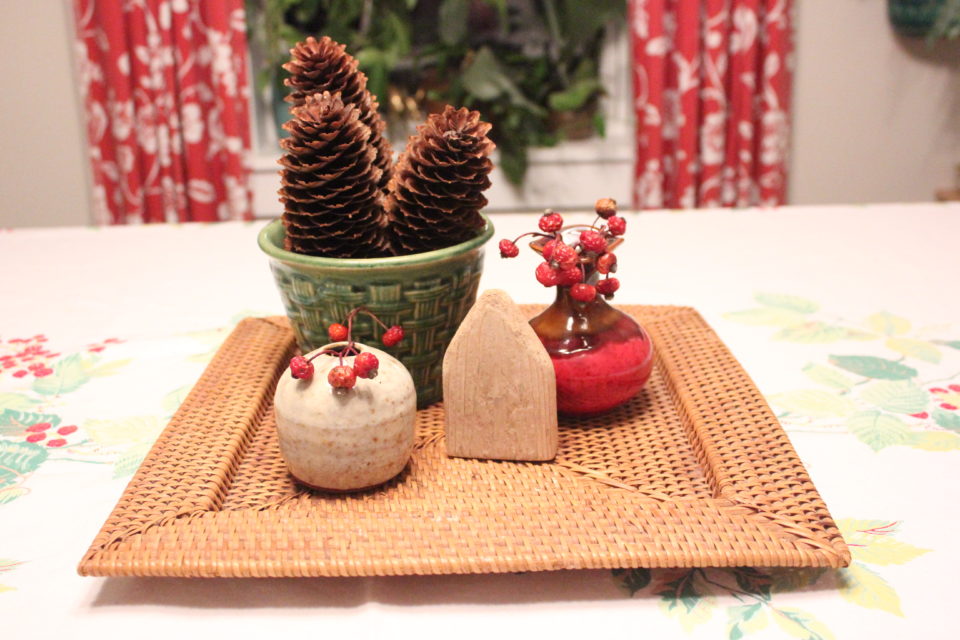
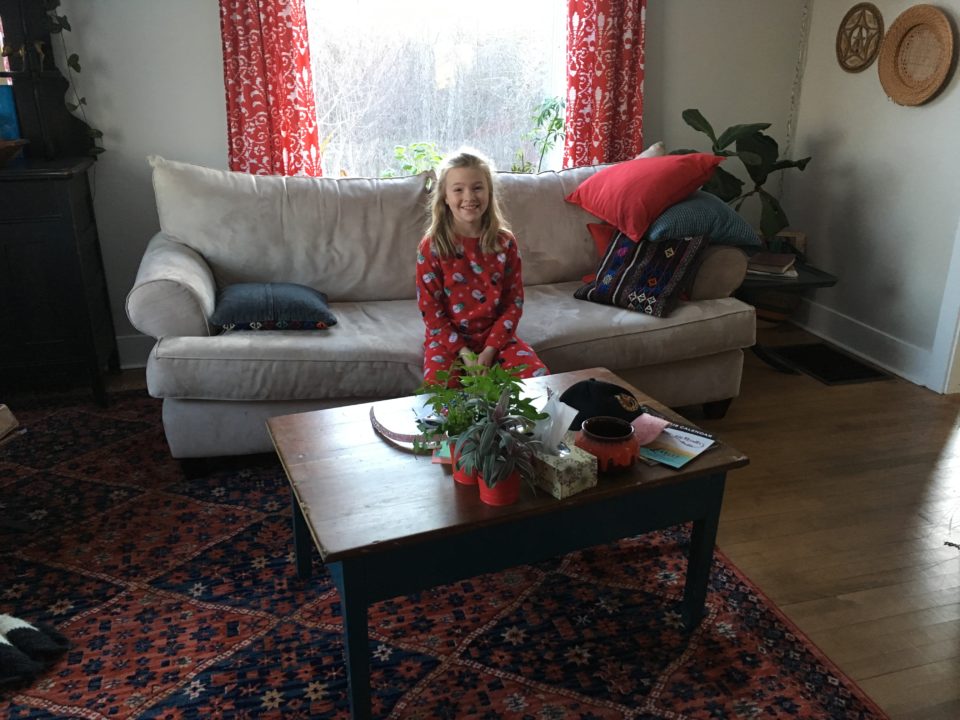
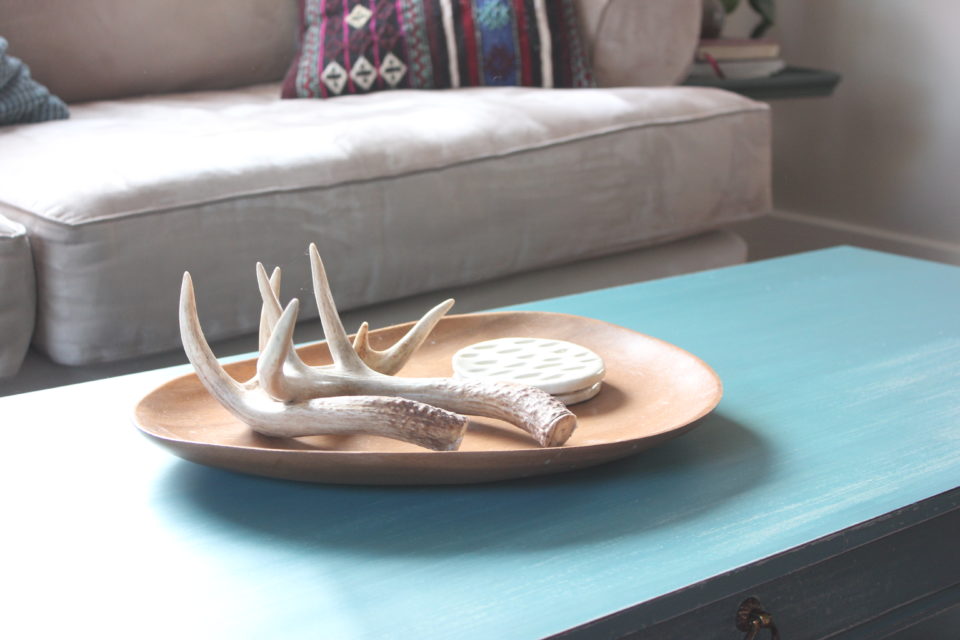
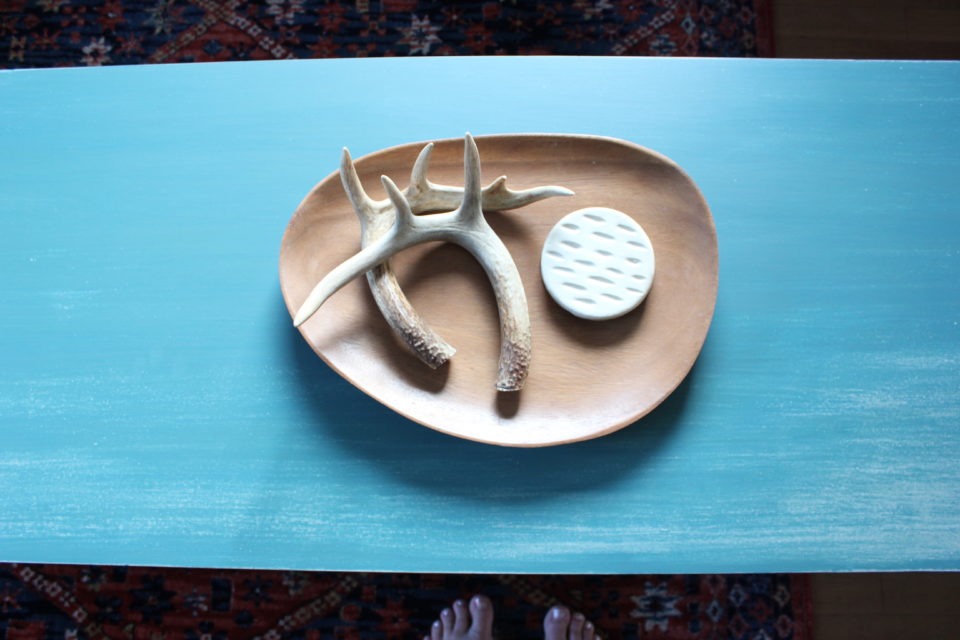
Our table got a wicker tray paired up with a few vintage finds and rose hips from the back yard.  I’ve had this table cloth for years but it was ticked away.  Lena pulled it out and I thought, why not?  Why do we keep things for special occasions when life is so fleeting?  We had it out, it got spilled on, so we washed it and yes, holes appeared, but we put it back on the table to be enjoyed, holes and all.  When it gets really bad, I’ll cut it up and turn it into something else!

I hope you enjoyed a little glimpse into how we decorate for Christmas here.  It’s pretty simple and different every year, which is fun.  You can see 2016’s post HERE and 2015’s tree HERE.  No idea why I didn’t do a post last year….no going back THAT far now!!

To be continued,

Lori

In Adventures/ Decorating

The Vintage Tourist Cabin

Last month the girls and I went up to visit Janice in Cape Breton and we stayed in the cutest little cabin and we’re going up one last time before winter hits! And I know you’ll love it just as much as we did so I’m sharing all the cutest here with you!

Let me start off by telling you how we ended up here and a little bit of the back story to the cabin.  Janice and I have been friends for almost 20 years now and because we visit back and forth so much, her friends have been very welcoming of me and my family and they have become my friends.  Barbara is one particular friend that shared my love of chippy red chairs and vintage finds.  And it just so happens that Barbara { and at least one sister, if not more?? } happen to have a cabin located just down the road from Janice’s.  But this cabin isn’t just any old cabin.  It is a cabin that belonged to their grandparents who had 6 or 7 of these cabins on their property and they rented them out as tourist cabins in the heart of Margaree.  So, it’s the most perfectly tiny, vintage cabin I have ever laid my eyes on.

When we were making plans to stay there the first time, Barbara told me where the key would be hid. No big deal.  Except we pull up to this adorable cabin and I start swooning over just how adorable it is with is chippy red door and blue shutters.  Then I pull out the key.  It’s a skeleton key.  Oh, be still my heart!!!!  And this was before we even stepped foot inside!!

Painted wood floors, old beds, comfy couch, vintage dishes, hand written notes, board games…I could go on and on but I’ll just show you the pictures instead…

Am I right???  Isn’t this the cutest place?  Barbara had it stocked up for us, spoiled us with treats and flowers.  We felt so welcomed and at home.  In fact, I was plotting and planning how I can possibly just move there forever…

There is something to be said for stepping back and taking things slower.  Take some walks, play some cards, sit with a warm cup of coffee and a good friend.  Or step it up a notch and play jenga… {my favourite but I don’t recommend playing with Hannah… }

As of right now, it is not listed for rental but when it does become available, I’ll be sure to let you know!! Or maybe I won’t so I can go stay there….. 😉

To be continued,

Lori


In Decorating/ Makeover

Coffee Table Transitions

Please tell me I’m not the only one who has pieces of furniture to fill the gap while I wait for the actual piece? Like my current coffee table, for example! And giving said coffee table a makeover or two in the meantime….perfectly normal, right?

Let me start at the beginning. Our living room is a little awkward to arrange. And maybe we made it more-so when we did the big switch of where the sofa sits in the room. But I so enjoy the space more with it in front of the east window, not the north window with our backs to the road. But, that means we need a narrower, shorter coffee table to allow traffic to flow easily from the dining room and without cramping Grace the Fern, too.

Since I had a few coffee tables in my stash, I tried every single one out that I had. I feel like Goldilocks and the 4 Coffee Tables.

This one was chunky enough but not narrow enough,  although Hannah seems quite pleased with it… The next one was too delicate and low but really a good width and depth. So they got passed on or made over { which you can read about HERE & HERE } Enter the table that came from the farm machinery auction because clearly that’s where one would go to buy a coffee table, right?  { I suck at remembering to take before shots before I start my makeover…again, notice my adorable family member peeking over the edge but don’t take note of the state of the studio!! }


It’s a little too long, but it’s narrow enough and low enough to comfortably put your feet up because that’s how we roll. I like that it has storage in a shallow drawer and a shelf below. So after a trial run, I decided that yes, it would work so I hauled it back to the studio to get painted. I decided on a neutral colour, a special mix of Miss Mustard Seed Milk Paint. Then I finished it with hemp oil, my favourite go-to finish. And drug that heavy sucker back into the living room. And I wish I could tell you how much I loved it.  But I didn’t.

Why did I think I would want a netural? I’m not a netural kinda gal. And it just blended into the sofa!! I’m all colour, right?? Ugh.  But I left it for a while.  I thought maybe my long-term coffee table might arrive but it wasn’t happening right away. { I’ll save that whole story for when it does arrive }

But what did arrive was a box of yummy, delicious Miss Mustard Seed Milk Paint!!!   Guys, I was thrilled.  Maybe you saw the Instastory?   You know how much I love the products and the process of using milk paint.  So, this gave me the perfect excuse to haul that heavy coffee table baaaaack out the to studio and paint it a colour I would be happy with.

I mixed up some Kitchen Scale with Flow Blue and got to it.  { I can’t seem to ever just mix one straight colour. }  I sanded heavily between the layers to add depth and show some of the previous colour, because it isn’t you, dear netural, it’s me… So, three layers and lots of pretty dust later, I was ready to hemp oil it.  Guys, if you have never hemp oiled a painted surface or metal or raw wood or leather, I recommend you get to it.  I’ll wait…..

There is something so deeply satisfying about seeing the depth and richness of colours blossom under a silky layer of hemp oil.  And this coffee table sure did come together for me in the end.  It’s bold and big and bossy but that’s what our monster of a sofa needed.


So, I wish I could say this ends the saga of Goldilocks and the 4 Coffee Tables but there’s another one coming eventually.  But until it does, this beauty will hold down the fort.  And the remotes, cups of coffee and whatever else I decide it needs to hold for us!

To be continued,

Lori

PS I was provided the products by Miss Mustard Seed Milk Paint, but my take on them are just that 😉


2 In Decorating/ Makeover

MCM Coffee Table Makeover

When certain projects come across my path, I know I have the perfect peices in my stash to help make them extra special.  So, when it came time to decorate a Stones Prestige Display Home called The Maritime, I knew I had the perfect table to give a makeover and be a fun little accent in the living room.

I love working with the Stones Prestige Homes crew and have been fortunate enough to lend a hand in the design of quite a few display homes now, as well as helping their customers create the right look in their own home.  In fact, I’ve even helped both Chantal and Danielle, the sisters who are the driving force behind Stones Prestige Homes, with their amazing homes, too.  So, after working together for close to 4 years now, they trust my judgement and basically give me free rein when it comes to the finishing touches for the display homes.  I will, however say, that I first met them when Michael and I purchased our first home with them

I had this table in my stash for years – I bought it when I was working around the corner from this little tea shop that also sold antiques, vintage and other random things.  I paid a whole $5 for it.  We used it for a little while but I never liked the scale of it with our sofa, so it got traded out.  Although, looking back on this picture, I sure do love it with that rug! And hey, where’s that wooden tray now?!!  Anyway, here’s the before:

I wanted to do something a little fun with it, instead of just paint it one solid colour.  So after I did a few coat of Miss Mustard Seed Milk Paint, I added a few stripes to it in colours that fit the interior….and well, as it turns out, the exterior, too.  I love the vibrant colour palette of navy paired with yellow.  So with some painters tape, I taped off a few stripes and painted them with a couple of coats.  And ta-da, a fun, unique table!!  I also sealed it with Tough Coat, so that if it is used, then the surface is ready to be put to use!

Here it is, sitting in its new home!

It’s just the right amount of fun and function!  The stripes add the pop that it needs against the sofa and rug.

Since the house is called The Maritime and sports a sunny yellow door against the prettiest blue siding, I thought the navy and yellow made good choices as a little punch on the table, too.  What do you think?

To be continued,

Lori

PS And if you wondered what MCM stands for, it’s Mid-Century Modern!!

1 In Clear Day Farm/ Decorating/ Makeover

Our Pyjama Lounge

I love rearranging furniture and shopping my home and stash to transform spaces in our house.  But I especially love it when I manage to create my new favourite place to hang out!

Have you heard of a Pyjama Lounge?  Am I talking crazy talk?  My kids think I am, they hate it when I refer to the spare bedroom as the Pyjama Lounge, but I just think it’s funny.  Why you might ask? Well, one of my go-to podcasts, Young House Love Has A Podcast, mentioned it in one of their weekly episodes { which you can check out HERE } and for some reason it stuck in my brain.  And this was long before we created the space even…but it stayed in my brain, rattling around, waiting for the perfect chance to pop out – when we created a cozy spot in our back bedroom, apparently!  And so you don’t think I’m completely off my rocker, even Apartment Therapy thinks its the cool thing to have in your home – you can read their article HERE.

Also, do you spell it P-Y-J-A-M-A or P-A-J-A-M-A?  I googled it….I’m a Canadian who reads a lot of books based in old Europe so I use Pyjama…. Random things that come to my attention while writing a blog post!

Anyway!!!!

Let me back up a little for you.  Nearly 4 years ago when we moved into our ‘new’ home, Hannah scored herself the biggest bedroom in the house.  She had all the toys, the bunk bed, the play kitchen, kids table and chairs – basically all the fun kid-stuff in her room. Here are some before pictures:

When we first moved in…

Fast forward to Winter 2017 when Lena begged to move into what was then our back bedroom.  It was our home office and spare room.  And that’s the bed that all the clean, unfolded laundry would land on.  It’s the smallest, most awkward room but it has a pretty sweet view over the hills and the horse pasture….which is exactly why Lena wanted it.  And besides, switching up rooms as a kid is just plain fun – I haven’t outgrown that yet 😉

So, Lena moved into the back bedroom and before we started shuffling beds, dressers and stuff, Hannah asked if she could take over Lena’s old bedroom.  And since I had no real reason to say no, she moved in there with half the toys she had and the rest got purged.   It took some time because I was doing it with just their help, Michael happened to be away when all this happened.  And it was a case of this had to move before you could move that and that other thing had to switch with that and so on and so on until finally each girl had their own stuff in their new space and I had a new spare bedroom and home office that was much roomier.  There was still the patching of walls, touching up the paint and then rehanging their own decorations….that part of it only took me about a year to get done 😉

All along, the plan for the back bedroom, was not only spare bed and office, but also a little sitting area, originally for Michael.  Now, even though the rooms have switched, the spare room is still on the back of the house and it still gets called ‘the back bedroom’.  But now that the back bedroom actually had more square footage, we had room to finally make that sitting area we talked about for years!  We hauled up the comfiest arm chair we own, a yard sale find that I upholstered while on maternity leave with Hannah, and tucked it by the window.

The room had been painted before we moved in and it was the prettiest shade of green.  But after nearly 4 years of living, it needed to be painted again.  So I grabbed my bucket of paint and got to work.  The above picture is everything piled into the center of the room so I could paint.  Hannah came in to give me a hand, too, she likes painting, too, and I like her company.  I hung curtains I had for The Verandah that never got used, a $13 score from Winners.  And then got to work putting everything back together.  I stole my rug back from Lena’s room, lugged up another chair from my stash and grabbed a little table for between the chairs.  I wanted a lamp, so again I turned to my stash and used a wooden base that I had found years ago at a local yard sale and then stole the shade from Lena’s lamp….poor Lena!!!

The colour palette was kind of based off the green arm chair and the yellows in the fluted chair, along with some tones in the rug.  I also painted my old wooden desk chair in Miss Mustard Seed Boxwood and sanded it way back so it looks like the paint has worn off from years of use.  And then the art that I started adding to my gallery wall just carried it along that path even more.  My grandmother’s painting, a few embroidery pieces that I was given when both my in-laws and parents were in the process of downsizing, a piece that I did, a tiny house on a hill painting…the gallery wall will grow and expand, especially as we get into yardsale season 😉  But that’s the fun part of it, too!

I find myself in here most evenings, laptop on my lap and a quilt wrapped around me.  It’s a cozy spot to curl up at the end of the day.  It’s relaxing and quiet.  There’s no TV, but if I want to watch Netflix, I have my laptop or my phone.  It’s also a great spot to read, too.  It’s such a luxury to be able to curl up with a good book!

And the best part – do you want to know how much I spent on this room update? Zero.  Zilch.  Zip.   Every last thing was already in my possession.  This is the benefit of shopping your home and having a stock pile of furniture to draw from.  { The down side is all the extra stuff takes up space which I also struggle with, you can read about that HERE and HERE }  The paint was leftover, the art was kicking around, and I always have various colours of Miss Mustard Seed milk paint on hand so I can paint something at the drop of a hat.  Like the day I decided I wanted to paint the little table yellow – so I took it out to the studio and painted it.

I hope you enjoyed the little tour of our back bedroom – I have it all fluffed and ready because Janice came to visit this weekend!!  We chatted, watched a great movie and hit IKEA!!  Sooo much fun!!

To be continued,

Lori